The Most Darling Christmas Triangle Fabric Banner
Do you have a few extra hours that you want to fill with a Christmas craft? Then you are NEED to check out my DIY Christmas triangle fabric banner tutorial.
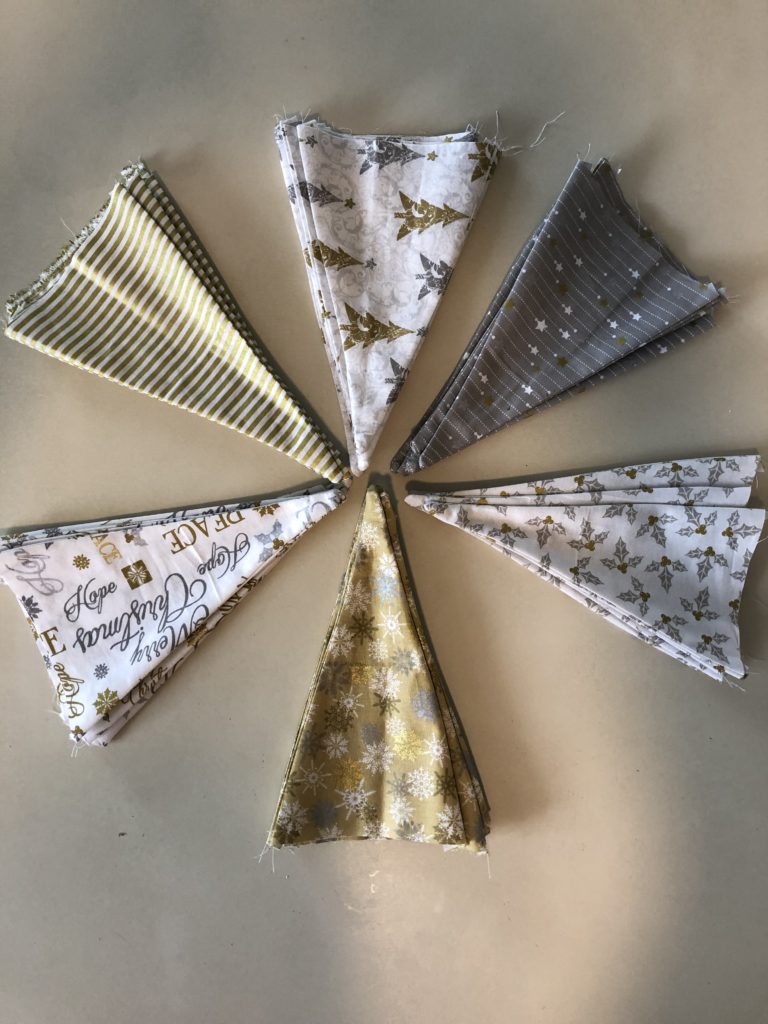
I was at the store about a month ago getting some fabric. My girls were with me so I was trying to hurry back home. As we were walking I looked down and stopped dead in my tracks. I was looking at the cutest Christmas fat quarters. And the best part 97 cents each. I knew I had to get some to make the most darling Christmas triangle fabric banner ever! What I love that it is Christmas without screaming Christmas.

I have made one fabric banner in my life. It is hanging up in Miss S’s room. I found a tutorial that was super easy and helpful. I tried to find it again but had no luck. So this time I’m on my own with just my memory of what I did last time and my triangle fabric banner as a model.
This can really be used for any occasion, just buy the fabric of your choice. If you want it for birthdays, then buy birthday fabric. If you want it for Halloween, then you got it, buy Halloween fabric.
These are the supplies you will need:
- fabric- how much depends on how long you want your banner to be. I bought 6 fat quarters in different fabric and it made a total of 5 triangles from each fat quarter.
- Bias tape for the top (if you use all of your triangles then you will need two packages)
- cutting mat
- cutter ruler
- rotary cutter
- thread
- sewing machine
- iron and ironing board (or your kitchen counter if you are like me)
- pen
- chopstick or something long and skinny

First you will need to iron all the fabric. My fat quarters were quite wrinkly.

Fold the fabric, right sides together, in half. This makes it easy to have your triangles ready to sew.

Then fold your fabric in half again. Take the right side to meet the left side. Keep the folded edge on the right side. Next rotate your fabric one time to the left. It will put the folded edge on top and the raw edge on the right.

Cut off the raw edge using your ruler and rotary cutter.
Rotate the fabric one time to the right, getting the folded edge back on the right side. With your ruler you are going to measure 3 inches out from the folded edge on the top. Make a mark with a pen.
You are going to cut your first triangle. Using your ruler find the 10 inch and place that on the mark you made at the top of your fabric. Angle your ruler on a slant until the tip of the ruler gets to the folded edge of your fabric. Cut along that line. When it is cut unfold to have a 6 inch triangle on top and 10 inches down each side.

Now rotate your fabric one time to the left. You will have raw edges on the bottom that you will cut off. Line up the ruler where the bottom of the triangle was and cut the yucky edges off.
Again you will rotate your fabric one time to the right. You want it to look like the picture below.

Now it’s time to cut out the next set of triangles. Take your ruler and measure 6 inches from the right side of the fabric on the top. Then angle the ruler to the point on the bottom of your fabric.

Once it is cut it will look like this.

Time to cut your last set of triangles. 🙂 Take off the ruler and your fabric should look like the picture below.

Place your ruler on the fabric on the top left corner and angle it to the bottom on the right side. The top should be 6 inches.

Now that you have five triangles (10 total pieces of fabric. Each triangle needs two pieces of fabric, right sides facing each other) you are ready to set them aside. Cut each of your fabric in the same way.

Time to sew! You only need to sew down the 10 inch sides, leaving the tops open.

When you get to the bottom of the triangle you can leave the fabric there. Just lift up the foot and rotate the fabric so you can sew the other side. Just make sure to put the foot down before you start sewing again.
When my girls got home from running errands with Eddy I had a helper for a bit.

Once all the triangles are sewn then you need to turn them inside out. This is where the chop stick or something skinny comes in handy. I cut the tip of the triangles off so there is not as much fabric bunched together in the tip.

Then go ahead and stick the chop stick in to help push out as much tip as you can. Be careful not to poke it through.

Iron each of the triangles so they lay flat. You can put your hand inside to help the seams stay straight.
Now we get to sew the bias tape on. Cut any corners off to make the top edge straight. It will make it easier to fit nicely inside the folds of the bias tape.
To pin or not to pin. You can experiment to see what is easiest for you as you sew the triangles into the fold of the bias tape. You can also sew the triangles as close or far apart as you want. I chose to sew them right next to eat other.

This is a pretty quick and easy project, just my thing! Miss L, my 4 year old asked if I could make her a Christmas triangle fabric banner to put in her room. She may not get it this year buttt it will be fun to make one for her when I do get a chance.
I have this big empty space above my piano that needs something. (I have a picture that I’ve been pining over for years, someday…). So this was the perfect place to put my darling Christmas triangle fabric banner.

If this sparked your fun for DIY holiday crafts then here is another one you will love. Let me know if you have any questions! Happy sewing and crafting!


I love this banner. It looks easy enough to make that even someone like me with very few sewing skills should be able to make it with little issue.
If I can make it, you totally can! It’s pretty easy. Let me know if you have questions. And I want to see yours when it’s finished. 😊🙌
I can see why you would stop dead in your tracks! I want to make one so bad. How about we get together and you show me how. I love it 😍.
Valentine’s theme?? Let’s get our craft on!!
Where did you get the fabric from? I’d like to use some of them in the future and they’re adorable!
They are way cute! I got them at Walmart. 💗 You’ll have to show me what you make.